
 Add to Favorites
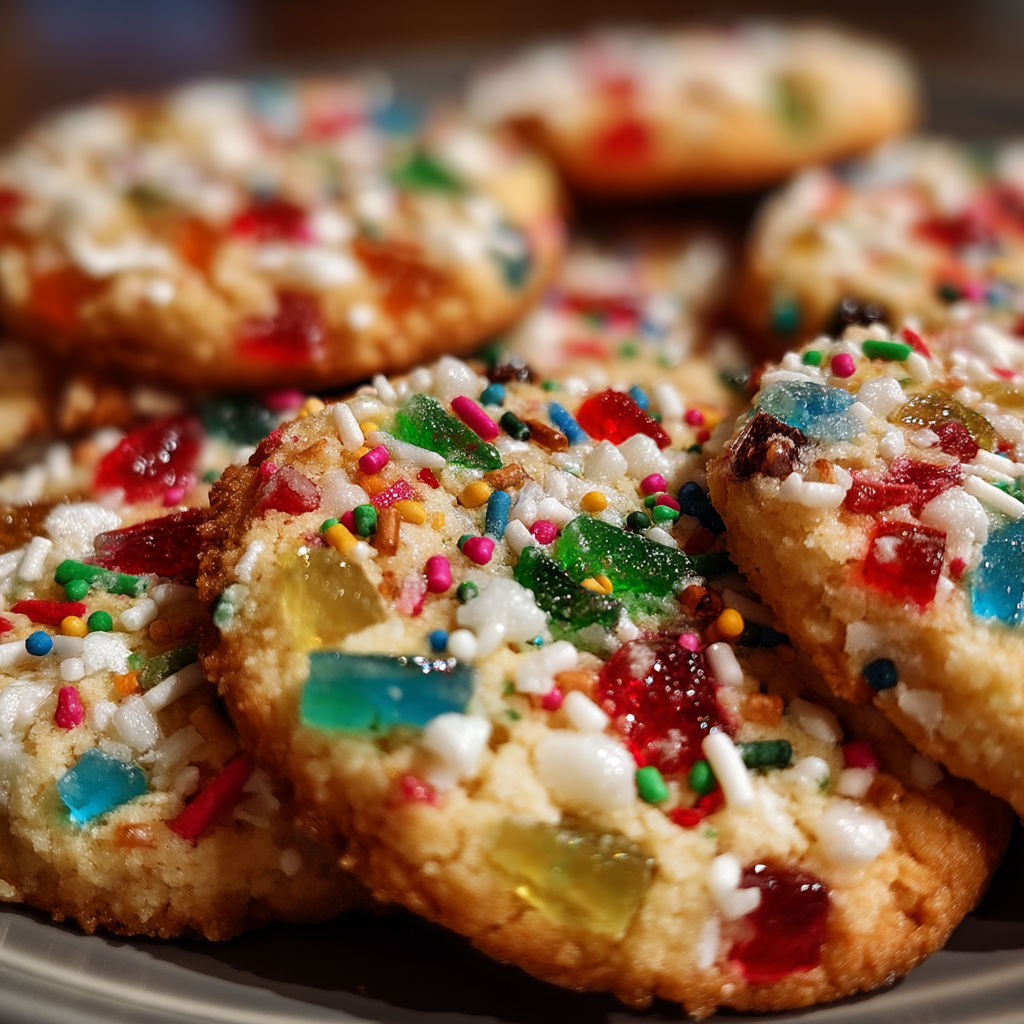
Few holiday treats light up a cookie tray like these stained glass cookies Their cheerful jewel centers glow against buttery tender dough and no two cookies ever turn out quite alike I first tried them for a school bake sale and the reactions from kids and grownups made these a yearly event
I remember making these on a rainy afternoon with my niece who was convinced each cookie had real gems in the center Every year we experiment with new candy colors and shapes
Ingredients
- Unsalted butter: brings classic richness Be sure it is at room temperature for perfect creaming
- Granulated sugar: provides sweetness and crisp edges Choose fine white sugar for the best texture
- Vanilla and almond extracts: add pure sweet aroma Use real extracts for deeper flavor
- Kosher salt: balances the sweetness and enhances flavor
- Large egg: binds and enriches the dough Eggs at room temperature blend best
- All purpose flour: forms the sturdy but tender cookie structure Fresh flour gives the best results
- Baking powder: ensures a light texture Replace if yours is more than six months old
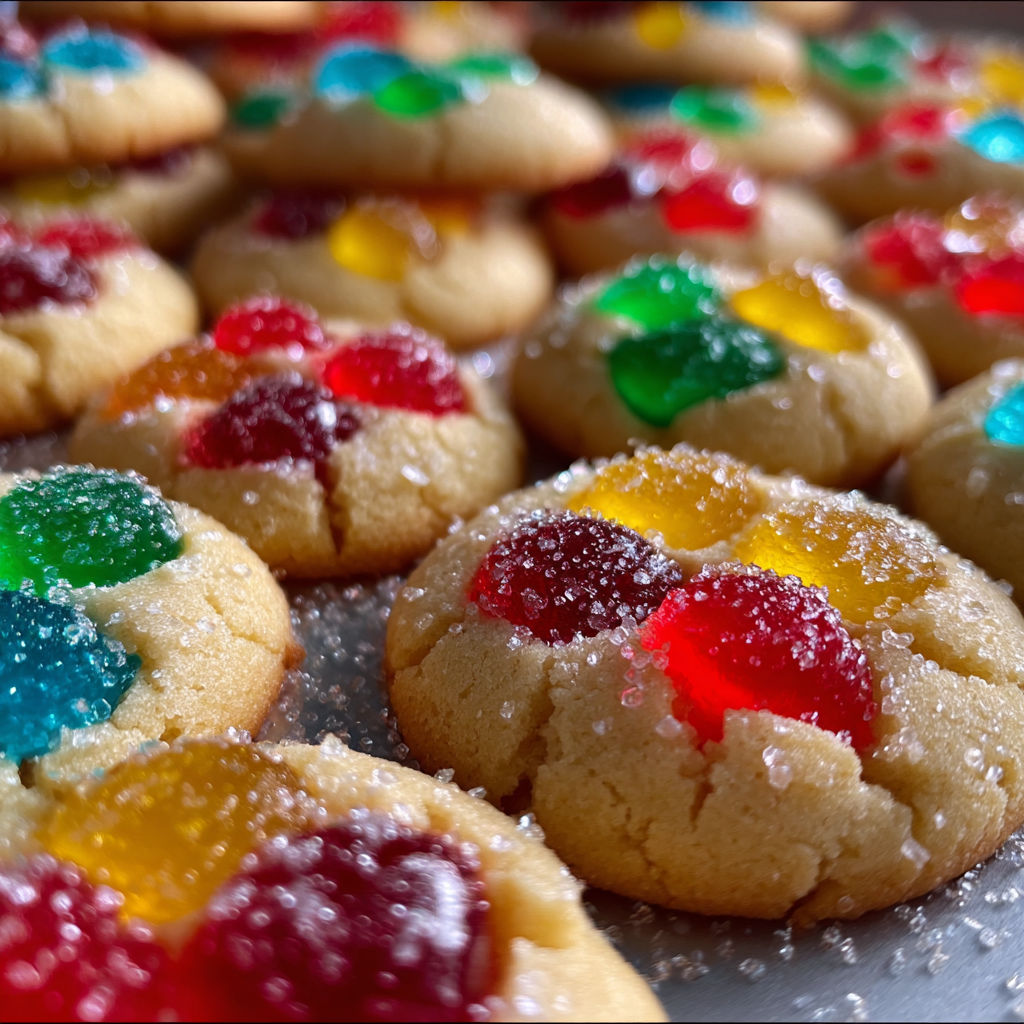
- Jolly Rancher hard candies: create the signature stained glass effect Separate by color for clean colors
- Sanding sugar: adds sparkle to the edges Optional but fun for extra holiday festivity
- Water: is only needed to help sanding sugar adhere if using
Instructions
- Cream the Butter and Sugar:
- Mix room temperature unsalted butter with granulated sugar in a large bowl using an electric mixer Beat for about three minutes until the mixture is light and fluffy This step creates tiny air pockets for a tender cookie
- Add Flavors and Salt:
- Beat in the vanilla extract and almond extract along with kosher salt Make sure they are fully mixed for even flavor
- Mix in the Egg:
- Add the large egg and beat until the dough is smooth with no visible streaks of egg
- Incorporate Dry Ingredients:
- Add all purpose flour a half cup at a time and sprinkle in the baking powder Mix until the dough forms and looks uniform but stop before it gets tough Divide the dough into two even balls
- Roll Out the Dough:
- Lay parchment paper on your work surface Place half the dough onto the parchment and use a rolling pin to create an even layer about one quarter inch thick Repeat with the other half for even batches
- Chill the Dough:
- Move the rolled out dough on its parchment onto baking sheets Cover with plastic wrap and place in the fridge for two hours or overnight Chilling stops cookies from spreading and helps them hold their shape
- Prep to Bake:
- Preheat the oven to three hundred fifty degrees Fahrenheit Line two large baking sheets with parchment or silicone mats to keep the cookies from sticking
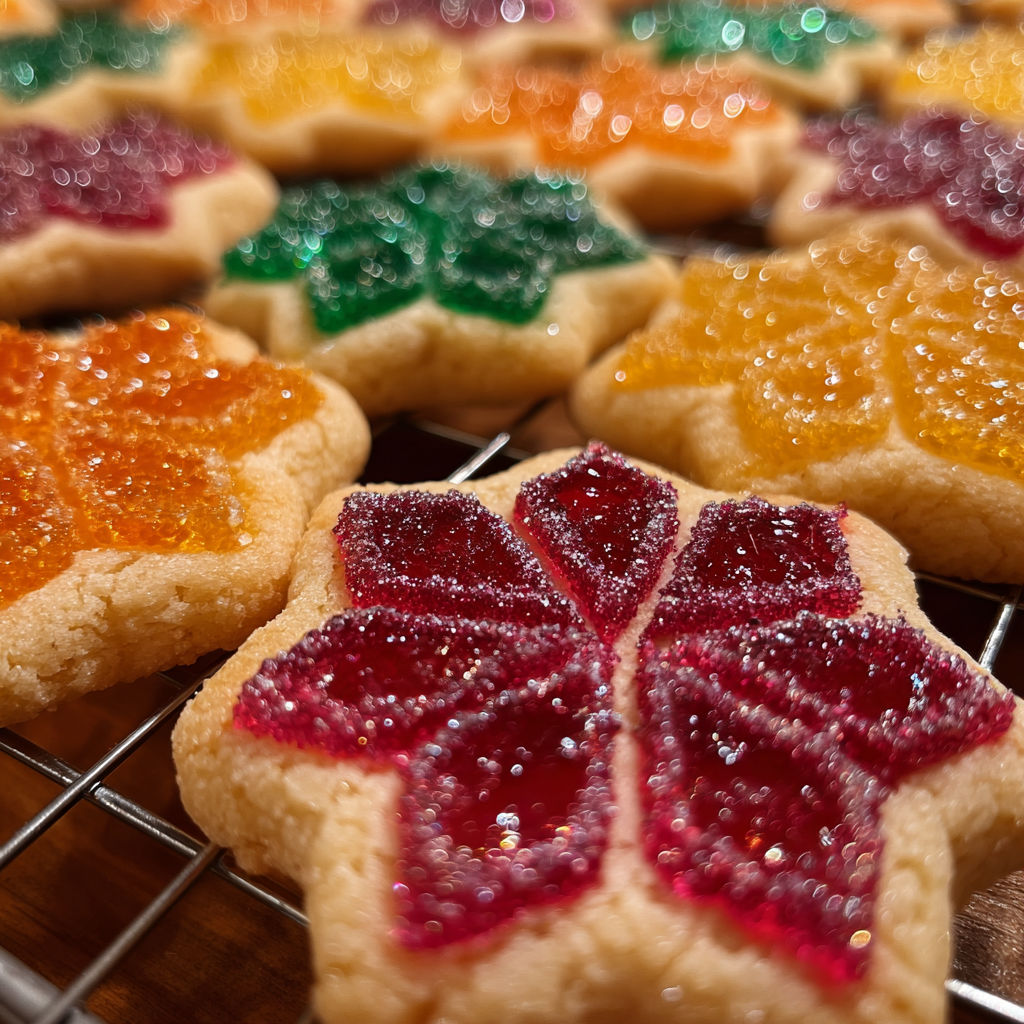
- Cut Out the Cookie Shapes:
- Find two cookie cutters of the same shape but different sizes The largest should be two to three inches Use the larger cutter to make main cookie shapes then use the smaller to cut out centers Transfer to baking sheet leaving space around each
- Fill with Candy:
- Unwrap the Jolly Rancher candies Crush them by color in separate bags or bowls Spoon crushed pieces into the cut out centers Make sure the center is full but not overflowing
- Bake to Perfection:
- Bake in the preheated oven for about twelve to fifteen minutes until the edges are set and the candy is melted and glassy Let cool completely on the tray so the stained glass center hardens safely
Watching candy melt smoothly into the cookie windows is my favorite part I always save a few bright green candies because my brother insists those make the prettiest cookies One year we strung them up on our Christmas tree and everyone asked for the recipe
Storage Tips
Store cookies in an airtight container at room temperature for up to five days Stack with parchment between layers to prevent sticking To keep the stained glass shiny avoid storing in humid or damp environments
Ingredient Substitutions
Butter can be swapped for a good quality plant based alternative for dairy free cookies Jolly Ranchers work best but any clear hard candy in your favorite flavors will create gleaming centers Try lemon or peppermint extract instead of almond for a twist
Serving Suggestions
Perfect as part of any holiday dessert tray Thread a ribbon through the holes before baking for edible ornaments Makes an unforgettable homemade gift packaged in a clear bag or tin
Cultural and Historical Context
Stained glass cookies became popular as a fun twist on classic cutout cookies in the mid twentieth century The colorful window effect mimics cathedral glass and quickly caught on for festive winter baking
Seasonal Adaptations
Spring Use pastel candies and flower shaped cutters Autumn Try leaf cutters with amber and red candies Winter Classic snowflakes and stars in cool colors
Helpful Notes
Press dough scraps together once and reroll for extra cookies Freeze unbaked dough for up to two months then thaw overnight in the fridge Cool cookies completely before moving so the candy centers set properly
Success Stories
My favorite comment came from a neighbor who received a tin and said she almost did not eat them because they looked like real glass After she tried one she came back for the recipe so she could make them with her grandkids
Freezer Meal Conversion
Prepare dough through the rolling and chilling stage Layer dough sheets between parchment and seal tightly in a freezer bag Freeze for up to two months Thaw overnight in the refrigerator before cutting and baking
With these cookies on your tray your holiday bakes will outshine all the rest Enjoy the sparkle and the smiles
Recipe FAQs
- → How do you create the stained glass effect?
The effect comes from cutting a window in the cookie dough and filling it with crushed hard candies, which melt to form colorful centers as the cookies bake.
- → Can I use different hard candies instead of Jolly Ranchers?
Yes, any clear, brightly colored hard candies will work, such as Life Savers or lollipops, to achieve a similar look and flavor.
- → Why chill the dough before baking?
Chilling firms the dough, making it easier to cut precise shapes and ensuring the cookies hold their form during baking.
- → How should I store these cookies?
Store in an airtight container at room temperature to keep the cookies crisp and the candy centers intact for several days.
- → Can I make these cookies ahead?
Absolutely. Prepare and chill the dough in advance, or freeze the shaped dough to bake fresh when needed.